 |
Open Online Education
|
Open Online Education-
Course Builder 1.10
- Meet Course Builder
- Set Up Course Builder
- Create a Course
- Customize Course Style
- Debug Course
- Prepare for Students
- Publish a Course
- Analyze Data
-
Administer Site
- Multiple Courses
- Permissions and Roles
- Advanced Site Settings
- Guides
- Web Server
- ETL
- Development Server
- Upgrade Course Builder
- For Course Builder Developers
- Feature List
- Release Notes
Multiple Courses
Your Course Builder site can host multiple courses. On this page, you will learn how to
- add a new course to your site
- set up Course Explorer to show a list of courses on your site’s landing page
- adjust the URL mapping of your site’s courses
Add a Course
Sign into an account with site-wide admin permissions.
Click Courses at the top of the dashboard menu.
Above the list of existing courses, you will see two buttons:

- Add Course… creates a new empty course
- Add Sample Course… creates a new course with sample content
Add an empty course
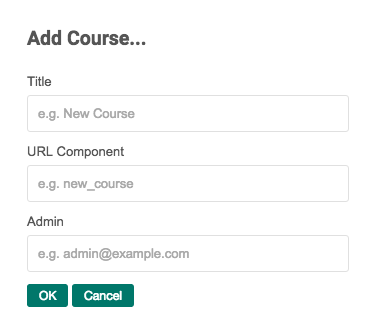
Click Add Course….
In the dialog that appears, there are three fields:
- Title
- URL Component
- Admin
Title
Enter the title for the course. This is the name of the course that will appear to students.
You can change the title of a course in Settings > Course.
URL Component
The URL component is the location within your site where the new course will appear.
For example, if your new course title is Writing Sonnets, you may want the course homepage URL to be
https://www.intro-to-poetry.appspot.com/writing_sonnets/
In this case, the text for to enter for URL Component is
writing_sonnets
Note that the URL component can only contain
- lowercase letters
- numbers
- underscores
The URL component determines the course’s namespace. You can change a course’s URL component, but the namespace is fixed when the course is created.
Admin
The Admin field defaults to your address. You can add other emails here delimited by a comma or a space to give others course-wide admin permissions for the course.
Finishing up
Click OK and you will be returned to the Courses page that now lists your new course.
Note in the dashboard menu, that the new course is now the current course.
At this point, you can
- click the launch icon to view the new course homepage
- click the course title to view the course outline and start adding course content
Add a sample course
You can also add a sample course. You provide the title and URL component for a sample course, but it comes with sample content of a completed course.
Click Add Sample Course… and then follow the same process for creating an empty course.
You can use a sample course as
- a playground for learning how Course Builder works
- a tool for creating a new course by replacing sample content with your own
Course Explorer
By default, your site’s landing page displays the course homepage of the first course you created.
When you add other courses to your site, you have another option: turn on the Course Explorer setting and the site’s landing page will display a list of the available courses on the site.
To turn on Course Explorer, you need to be signed into an account site-wide admin permissions.
-
Go to Settings > Advanced site settings.
-
Find the Course Explorer setting in the table. The default value is False.
-
Click Edit to change the value.
-
Under Configuration Property Override, check the Value checkbox and set Status to Active.
-
Click Save.
Navigate to your site’s landing page and confirm that you see a list of courses. For each course, you can see the course’s
- title
- abstract
- instructor details
These details can be edited in the course settings (Settings > Course).
The course that was on your site’s landing page can still be reached directly using the URL component assigned when the course was created.
You can change the URL component for that course and any course on your site by changing the URL mapping.
Change URL Mapping
When managing multiple courses, you may want to adjust a course’s URL component after the fact.
-
Go to Settings > Advanced site settings.
-
Find the Course URLs setting and click Edit. For this setting, the Value field is a text field.
-
Scroll through the file to find the course whose URL you want to change and make the edit directly in the Value input field.
Notice that each line is a course that lists its URL component followed by its namespace.
When adjusting the URL, make sure to maintain the rest of the line’s format. Do not change the namespace to match the new URL; the namespace must stay as it was originally created.