|
Open Online Education
|
Open Online Education-
Course Builder 1.11
- Meet Course Builder
-
Set Up Course Builder
- Create a Cloud Project
- Get Course Builder
- Deploy Your App
- Visit Your Site
- Create a Course
- Customize Course Style
- Debug Course
- Prepare for Students
- Publish a Course
- Analyze Data
- Administer Site
- Upgrade Course Builder
- For Course Builder Developers
- Feature List
- Release Notes
Create a Cloud Project
Your app will be a project on the Google Cloud Platform. Shortly, you will create a cloud project, and Google will ask you for a project name and ID.
The project name is not that important, but the project ID is. It is worth putting some thought into what your project name and ID should be before setting up your project.
Naming Considerations
There are three things to consider when naming the cloud project for your Course Builder app.
- project name
- project ID
- site URL
Project Name
The name of your project determines the default project ID that Google picks for you. You can change the default ID, but the easiest path is to start with a good name for the project in the first place.
-
If your site will have a single course, use the course name for the project name.
-
If your site will have multiple courses, then consider a project name based on the primary course, an overarching topic, or your organization’s name.
To be valid, a project name must
- be between 4 and 30 characters
- consist of letters, numbers, quotes, hyphens, spaces or exclamation points
Project ID
The project ID is a single word (no spaces) that uniquely identifies your application.
The project ID is one of the component’s of your site’s URL and it cannot be changed after the project is created.
Thus, it is good to decide ahead of time what ID you want and to be prepared with alternatives in case your first choice is already taken.
Site URL
Your site URL is based on your project ID. Here’s an example:
Suppose you are teaching a course with the title “Underwater Basket Weaving.”
You name the project Underwater Basket Weaving, and Google suggests underwater-basket-weaving for your project ID.
If you accept this ID, then the URL for your site’s landing page will be
http://underwater-basket-weaving.appspot.com/
appspot.com is the domain name for all projects run on Google App Engine.
(If you prefer, you can use a
custom domain for your course instead of relying on the appspot.com
domain.)
When you have a name and ID in mind, you are ready to create the project.
Set Up the Cloud Project
Sign into the Google account that you will use with your Course Builder app.
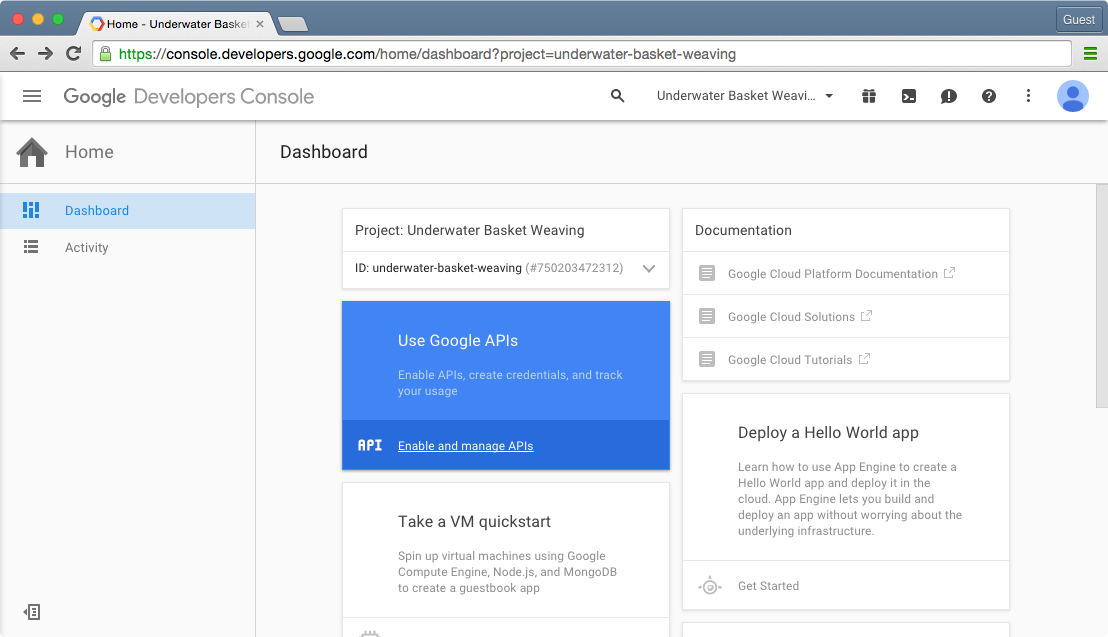
Navigate to Google Developers Console.
At the top of the console, find the Select a project menu button. Click this button and select Create a project….
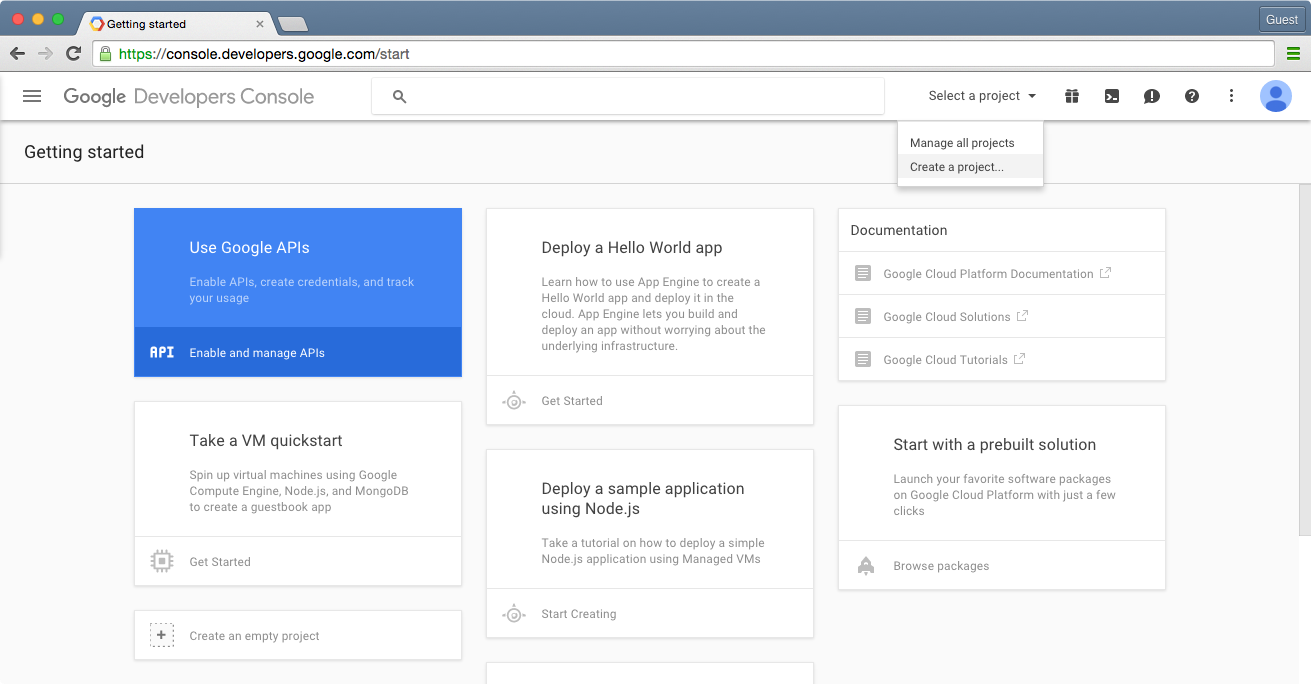
(If there is already at least one cloud project set up for this Google account, then the menu button will show the name of the current project rather than Select a project.)
Set Project Name and ID
In the New Project dialog, enter the Project name.
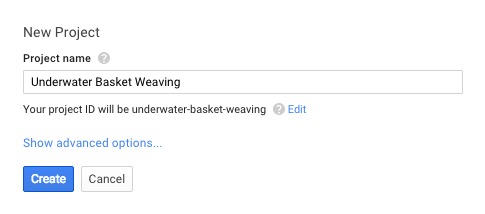
Below the Project name field, Google will suggest a project ID based on the project name that you enter.
If the suggested ID is what you want, click Create.
If not, click Edit and enter a different project ID.
Google will tell you if the ID you entered is unavailable (taken by another project) or invalid due to its number or type of characters
When you have a project ID that both you and Google are happy with, click Create.
Your project will now appear in the console. Leave the console up or make a note of the project ID before continuing. You will need the project ID to configure your Course Builder app.