 |
Open Online Education
|
Open Online Education-
Course Builder 1.11
- Meet Course Builder
- Set Up Course Builder
- Create a Course
- Customize Course Style
- Debug Course
-
Prepare for Students
- Registration
- Student Groups
- Certificates
- Invitations
- Forum
- Announcements
- Search
-
Translations
- Set Up Translation
- Translate Content Internally
- Translate Content Externally
- Publish a Course
- Analyze Data
- Administer Site
- Upgrade Course Builder
- For Course Builder Developers
- Feature List
- Release Notes
Translate Content Internally
Course content can be translated directly in the Course Builder dashboard.
Typically, you bring someone in to translate your course and create a translator role to grant the translator limited admin access. The translator works in the translation console, and you manage and keep track of translation progress in the translation dashboard. When the translation is complete, you update the course’s translation settings to make new languages available to students.
Create translator roles
A translator role grants dashboard access that is limited to translation-specific and language-specific tasks.
-
Go to Settings > Roles and click Add Role.
-
Name the new role something like “Translator-Spanish”.
-
Enter a description.
-
If you know who will fill this role, enter their email addresses in the User Emails text box. Separate multiple addresses with commas, spaces, line breaks, or any combination of the three.
When someone visits your site while signed into the Google account associated with one of these addresses, he or she will have the permissions associated with this role.
Permissions for translators
Below are the suggested permissions for translators:
-
Can access the translation (or i18n) dashboard - This permission is essential because it is how translators get to the translation console.
-
Can submit translations for [a specific language] - By granting permission for each individual language, you prevent a translator from accidentally adding translations in the wrong language console. Translators will only be able to open the translation console for the languages that they have permission to work in.
Translation Dashboard
The translation dashboard is useful for tracking translation progress as well as navigating to the translation console.
Go to Publish > Translations to open the translation dashboard.
At the top of the dashboard, there are are two buttons:
-
Delete Translations: Clicking this button allows you to select individual translations and delete them.
-
Settings: Clicking this button takes you to the same settings found at Settings > Translations. It is a useful shortcut when you are in the translation dashboard and notice that you need to add another language.
The main part of the translation dashboard is a table that shows all the parts of the course, the languages that the course is or will be translated into, and the translation status of each element in each language.
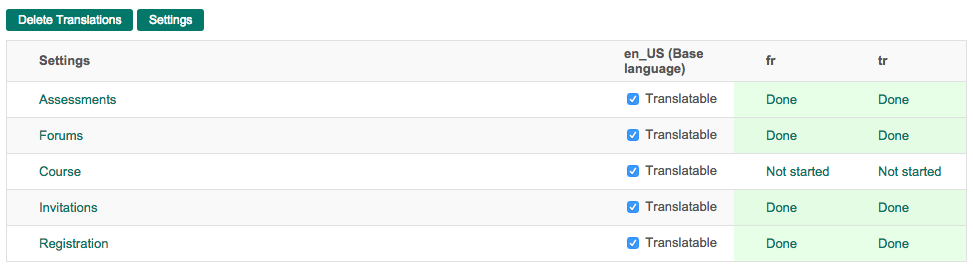
Note that the screenshot shows only the first category of the course material displayed in the translation dashboard - Settings.
Translatable
By default, all course elements are considered Translatable.
If you want to indicate to translators that an element should not be translated, uncheck its Translatable checkbox.
Translation status
Each element in the course has a translation status for each language. The possibilities are:
- Not started
- In progress
- Done
If your course has one or more languages added, notice that some elements are already marked Done. These elements have no custom content, and Course Builder marks items with no content or blank content as Done rather than leaving them blank. This makes it easier to tell when a course has been completely translated – everything will be marked Done.
You can see the results of the translation by clicking the ![]() icon next to the
element’s status.
icon next to the
element’s status.
For any element, you can click its status to open the translation console.
Translation Console
Click an element’s translation status to open the translation console.
The translation console is a simple interface for translating each element in a course into a specific language.
The screenshot below shows the results of clicking Not Started on the Course row and fr column of the Settings category in the translation dashboard.
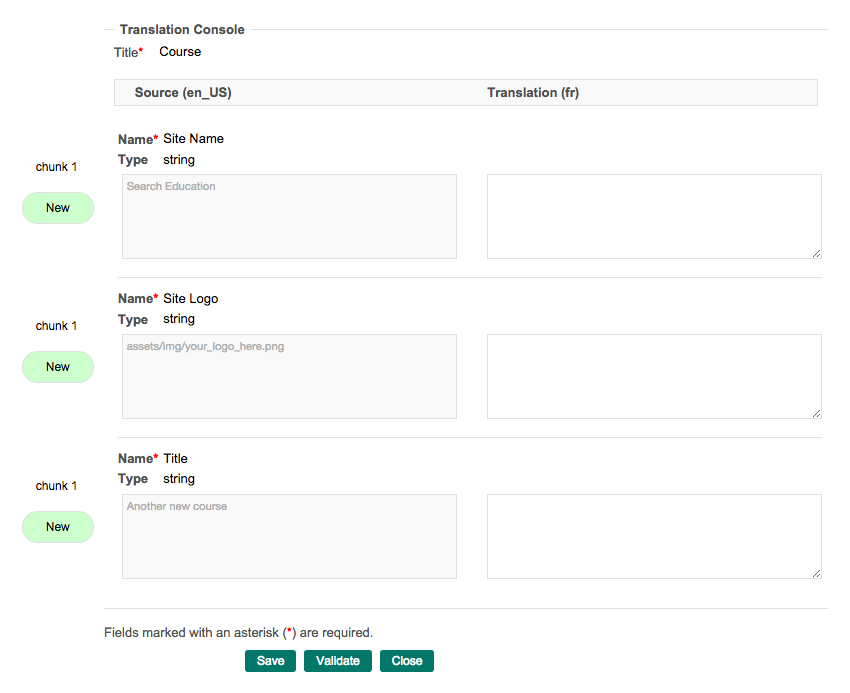
The translation console breaks the selected element into chunks for translating. For each chunk, the content to be translated is shown in the lefthand text box. This content in the base language can be selected and copied but not edited.
The translator enters the translated content in the righthand text box. When text is entered for any chunk, the dashboard will update that element’s status to In Progress.
After a chunk has been translated, it should be validated and saved using the buttons at the bottom of the console:
- Save - save the translated text
-
Validate - check for
- HTML or other markup errors in the translated text (like mismatched tags)
- any markup tags in the default text that are missing in the translated text
- Close - close the console and return to translation dashboard
When all chunks of an element have saved translations, the dashboard will update the element’s status to Done.
Check for Non-textual Material
The translation console captures the textual material of your course, but it can’t capture non-textual material, such as words within an image.
You can use this command-line tool to identify non-textual material in your course that may not appear in the translation console.
Update Translation Settings
When a translation to a new language is complete and you are ready for students to access the course in that language, go to Settings > Translations. In the Other Languages setting, update the language to Available.
Also consider enabling the Prevent Edits setting to prevent accidental changes to the translated content and improve page load times.