Tracks
Create tracks to provide distinct subsets of the course material that students can select to follow.
For example, you can make an advanced track for your course that includes extra units covering advanced material and skips introductory material.
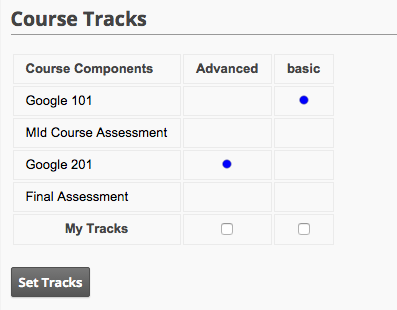
Each track that you create and the elements that comprise it are shown to the student in Course Tracks section of the Progress tab.

A student can then select or unselect one or more tracks.
Back in the Course tab, the syllabus will only show the elements in the chosen track(s).
If the student does not select a track, then the complete course is shown on the syllabus.
Note that selecting a track (or not) is entirely up to students. If you are looking to control which students have access to content, create student groups instead.
Create a Track
-
Go to Create > Track and click Add Track.
-
Enter the title and an optional description.
You can edit an existing track by clicking its name in the list of tracks.
Track Keys
Select an existing track and take a look at the URL for the track page. It includes a value for ‘key’:
https://<project-id>.appspot.com/dashboard?action=edit_track&key=5175325533143040
You can use this value to create an additional registration question that determines which track will be selected for the student. Learn more about offering a choice of tracks.
Assign an Element to a Track
You can assign top-level elements (units, assessments, or links) to a track.
-
In the course outline, select a top-level element or add a new element.
-
Find the Tracks field and ensure that only the tracks that you want the element to be a part of are checked. By default, an element belongs to all tracks.
If an assessment is a pre- or post-assessment for a unit, then you will not be able to select a track for that assessment. A unit pre- or post-assessment can only inherit the unit’s track(s), if any.
 |
Open Online Education